Posts

Zilla Arrives

Image
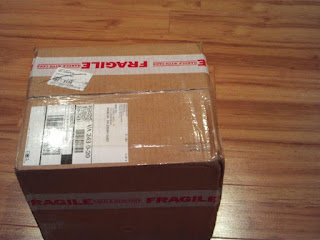
Ok after about 8 months of waiting it arrived!! The zilla's here. Pretty exciting. Surprisingly I didn't just tear open the boxes. I had a Sim racing league race that evening so i just put them aside. However as fate would have it my computer hiccuped after qualification and I wasn't able to race. So I opened the boxes and basked in the glory of having more EV parts. Let's re-live the box opening for those that haven't done it. Here is what it looks like when it arrives. Just Like Christmas. In side the box is 2 smaller boxes. The controller in one and the hairball and cables in the other. Of course included is the handy dandy notebook...or manual. I also purchased the hall effect pedal (in it's own box) so I can do the full drive by wire. Here it all is right before I reboxed to put on the shelf. . Guess I need to get to work on it all again.

2nd gear "removed"

Image
Progress is slow at the moment. Amazing how much time earning a living and raising a family can take. Oh and I joined an online Sim racing league (again) . That didn't help. My EV project is a hobby anyway. The sooner it's done the sooner I'll be thinking of some other project. Not much to report except I did grind the teeth off 2nd gear. Didn't really take that long. Used a thin cutting wheel on my angle grinder to cut off most of the teeth. Kind of like cutting the kernals of corn of corn on the cob. Then I took a grinding wheel to it make it mostly round. Here's a before and after picture. Took about 30 min. Wife said the sparks were more impressive than the firework fountains we usually buy for the 4th of july

Trans is damaged

Image
EV construction has been slowed for some Tramission issues. I've gotten the transmission apart. The trans that "worked fine just needed a rebuild" is missing many teeth on 2nd gear. This trans is basically beyond repair. I wish it had been 1st gear as I probaby don't need 1st gear. The way it was the trans sounded like it was crunching gravel. No suprize there. For now I'm thinking I'll grind off ALL the 2nd gear teeth and just go without a 2nd gear. May not need it so much. I can get another transmission later. We'll see. I think finish my adapter plate and then decide.
Image
UPDATE: When I spun the trans with the motor the transmission sounded like it was full of rocks. I was told it made a "rattle" when I bought it. I figured it just needed new bearings but this was a much more than a rattlle. Either way the trans needed to come apart so apart it came. Turns out there are many teeth broken off 2nd gear. Too bad it wasn't first gear as it that doesn't seem to be needed in and EV. I'll spend some more time practicing rebuilding this transmission as with a car of this age the next trans I buy will likely need some rebuilding too.

Mate motor to trans

Image
Did a little more work. Mated the trans to the motor. Have some more trimming to do on the adapter plate (or plates depending on how you look at it). I mounted one plate to the motor and one to the trans. With the trans setting on the motor and the input shaft engaged with the clutch I spun the motor and centered or checked to ensure it was centered prior to pining the 2 plates together. One thing I found was the clutch alignment tool would align the clutch disc so the trans could be installed but it was not truely centered. So I used the dial indicator to center the clutch plate prior to putting on the pressure plate. This turned out perfectly. Couple of pictures. The taper lock installed on the motor Transmission on top of the motor.

More on the motor flywheel adapter.

Image
For this project I found some software to download for FREE (Alibre Design) that is ALMOST as good as what I used at work back then. Edit. Alibre Design sucks. They said it was free but then a few months later disallowed usage of the program. SO now my documents are drawn in a program I can't use. I DO NOT recommend it. As far as the wild machining. All the center features were as purchased (it started life as a taper lock sprocket). The blind tapped holes aren't too difficult. Well being the holiday I had some time to work on things. Turned down the OD of my pilot bushing myself. Seems they don't make a 15mm ID bearing with the OD to fit the Warp 9 motor. So I started with a Mcmaster carr HPF bushing (6659k28) and reduced the outside to about .001 over the bore dia of the hole in the motor. Well I first tired .010 over but when I pressed the bushing in it shrank the ID. The bushing was only a $1.50 so I had bought 2. good thing. Try 2 was successful and I now hav

Parts back from the machinist.

Image
My Flywheel adapter and one AL plate came back from the machinist today. I love seeing the parts turn from Cad into Real life. The adapter looks like it will work out exactly as planned. I have bolted it to the flywheel and slid it onto the motor shaft. I'll check it to see if it turned out true and straight and then I can go on to making the transmission plate. Here ae a couple pics. Below is the adapter setting in the back of the flywheel